Overview screen
The overview screen shows all manifests that have been created by your organisation or the system. Each line is one manifest. The detail screens are available under Details or Edit. Here you will find, among other things, more information about any status and timelines.
For automatically preparing manifests, the service uses information from the service Vessel Notification. In the overview screen, several tabs are visible on the left-hand side to make work more efficient and clearer:
- All manifests: here you can find all manifests regardless of the status (see the image below)
- Urgent: manifests that need attention because the vessel has departed while the manifest is not in the final Accepted status. It is possible to manually remove a manifest from urgent by selecting the 3 vertical dots followed by Remove from urgent.
Using the various filters on the left-hand side of the screen, you can look up manifests. You can do this by Vessel status, Manifest status and Departure date. You can also search via the search bar by Call Reference Number and vessel.
Details screen
For each manifest you will see Edit or Details. Here you can edit the manifest or view the details.
Editing is only possible if a manifest has not been sent or has been rejected after submission.
Create new manifest
You add new manifests by selecting + New Manifest in the overview screen; this option is in the top-right corner. A new manifest will open.
- Search for the vessel via the CRN or vessel name to create the manifest. Vessel visits shown in grey have already been created by your own organisation or automatically by the system.
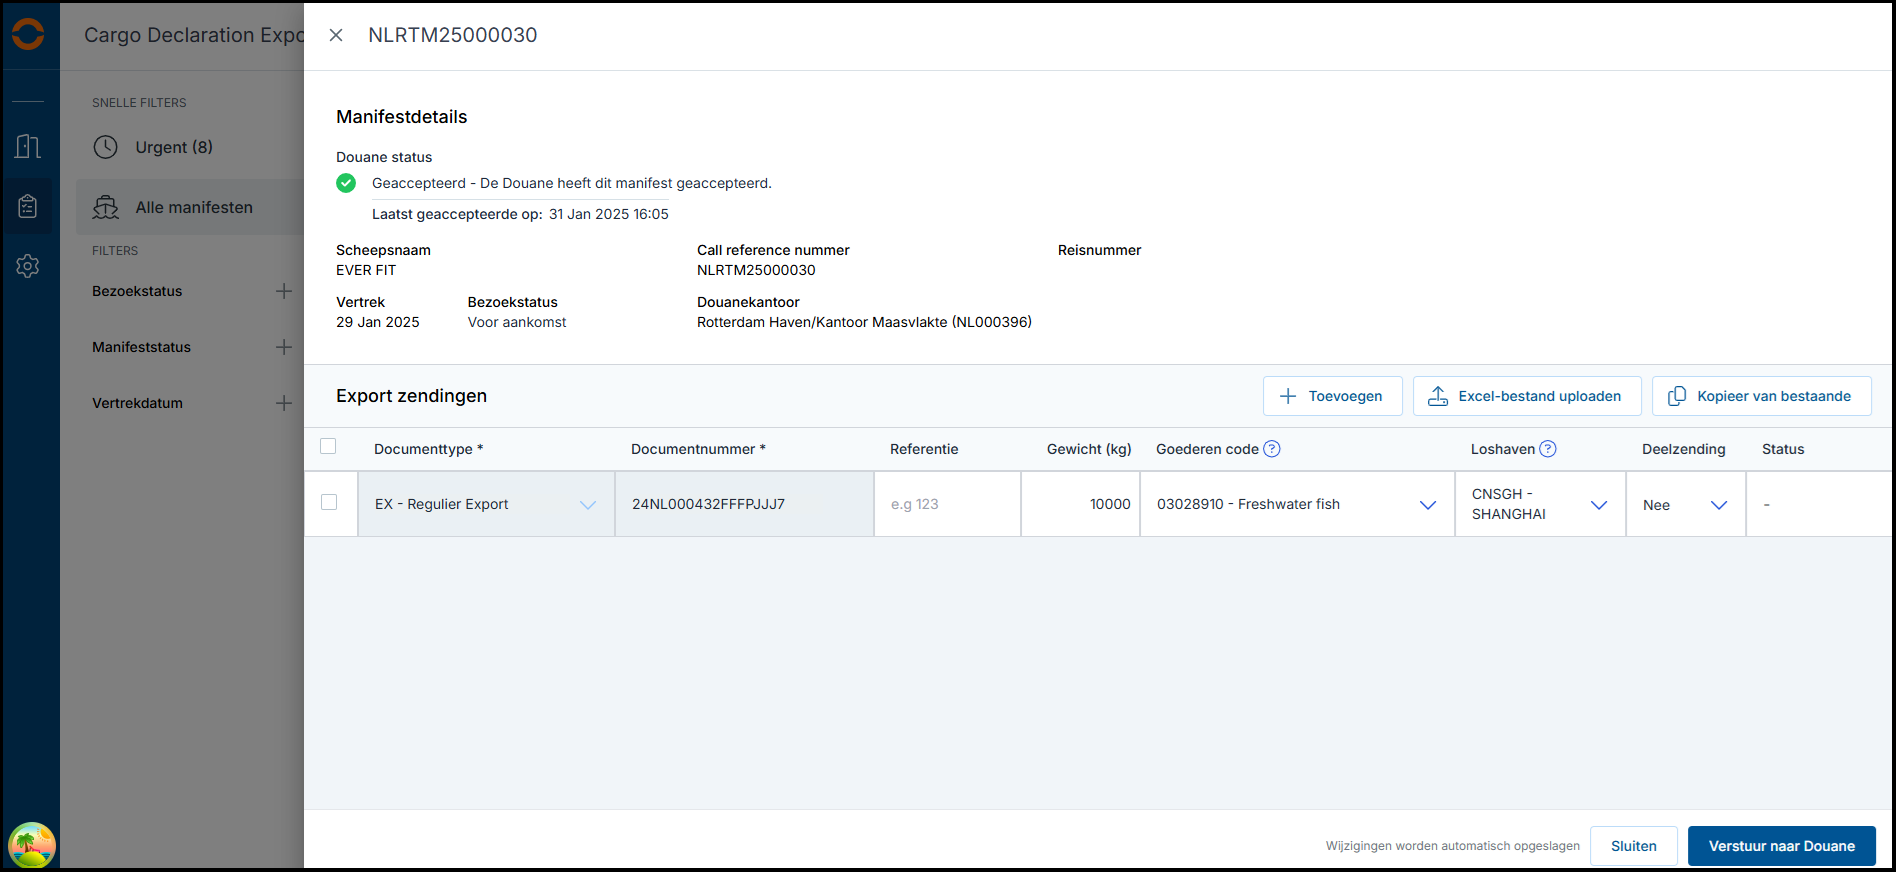
- You can add documents to the manifest in 3 ways. In the screen below you can see where the options below are located.
- + Add manually add document type and numbers
- Upload Excel file: Use a manual upload to efficiently add a large number of documents to the service. The template is available in the upload option.
-
Copy from existing: documents for which you have reported the arrival, or have been assigned by a terminal, can be found here. The status of the arrival notification is also visible
- Follow the steps indicated by the system and send the manifest by clicking the button Send to Customs. at the bottom right.
Meaning of the manifest statuses
See the image below for the possible statuses visible in the overview screen and the corresponding explanation.
Deleting a manifest
A manifest can only be deleted in the service if it has not been sent to Customs.
To cancel a sent manifest, you must send an empty manifest to Customs. It will then still remain visible in the service.
When deleting, the manifest is no longer visible in the service. In the image below you can see where the delete button is located in the detail screen of a manifest.
Settings for email and other preferences
The service offers the option to set up email notifications and preferences. The settings for email notifications and preferences can be found in the overview screen on the left-hand side under Preferences.
The main administrator of an organisation has the option to manually add email addresses, set up notifications and set other preferences. If you do not see the pencil icon, ask the main administrator of your organisation to adjust the settings.
Set up preferences
A default document type can be set. When creating a new arrival notification, this document type will be selected by default; the document type can always be changed.
Set up email notification
You can choose to set up a notification for various events. These notifications are sent to the user of the service. At the moment, you can set this up for:
- Manifest rejected
- Manifest urgent
The added people receive the notifications without having access to the service. External email addresses can also be added.
Select the pencil icon. A screen will then open in which email addresses can be added and deleted.
Related to