The service opens in the overview screen, which shows all arrival notifications created by your organisation; each row is one arrival notification. The detail screens can be found under Details or Edit. Here you will find, among other things, more information about any statuses and timelines.
Overview screen
In the overview screen, various tabs are visible on the left-hand side to make the work more efficient and clearer:
- All notifications: this shows all arrival notifications regardless of the status
- Not sent: arrival notifications that have been created but not sent
- Important: arrival notifications that have been sent but not processed successfully.
You can look up an arrival notification via the various filters on the left-hand side of the screen and by date range.
In the All notifications tab, a filter by status is also available. You can also use the search bar to search by document number and reference. Below you can see an example of the overview screen.
Detail screen
For each arrival notification, Edit or Details is shown. Here you can edit or view the arrival notification data.
Editing is only possible when an arrival notification has not been sent or has been rejected after being sent.
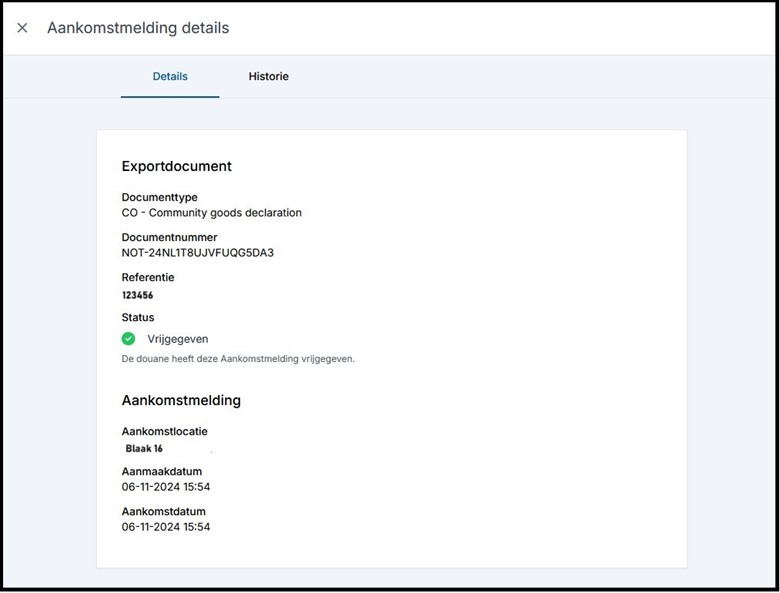
Details tab
In the Details tab you will find the details of the arrival notification. This is the information that has been sent to Customs. Below you can see an example.
 History tab
In the History tab, you can see the steps the arrival notification has gone through in chronological order. Here you will find, among other things, information on when the arrival notification was created and accepted by Customs. You can also see information about any inspection and change(s) to the arrival notification. The image below shows an example.
Edit screen
When an arrival notification has not yet been sent or has been rejected after being sent, the Edited link is visible behind the arrival notification in the overview screen. Click Edit, and the screen below will open. It shows the document type, document number and, where applicable, the reason for rejection / non-processing of the arrival notification.
Add a new arrival notification
Add a new arrival notification by clicking + New Arrival Notification in the top right. A new arrival notification will open. See below what this looks like.
- Document type: enter the document type here (required field)
- Document number: document number (MRN) obtained from Customs (required field)
- Cargo handling agent: this field is only visible for Terminal and can only be completed by a terminal. Selecting a Cargo Handling Agent ensures that the notification becomes available in the Cargo Handling Agent’s overview for the export manifest.
When you make the shipment available to the Cargo Handling agent, you as terminal must always send the arrival notification.
- Arrival location: (required field) enter the location where the cargo will be presented. You can set up fixed preferred arrival locations. You can do this via the menu on the left-hand side of the screen. Choose Settings for mail and other preferences.
Statuses of the arrival notification
In the image below you can see the possible statuses in the overview screen and the corresponding explanation.
Delete an arrival notification
An arrival notification that has not been sent to Customs can be deleted. In the image below you can see where the button is located.
Settings for e-mail and other preferences
The settings for e-mail notifications and preferences can be found in the overview screen on the left-hand side under Preferences.
The main administrator of an organisation has the option to add e-mail addresses for notifications and other preferences. If you do not see the pencil icon, ask the main administrator of your organisation to adjust the settings.
Set up preferences
- You can set up a default document type. When creating a new arrival notification, this document type will appear by default; you can always adjust the document type.
- You can specify preferred arrival locations. You can save an arrival location under a name of your choice (alias). When creating an arrival notification, you can then easily select an arrival location.
notification settings
This screen offers the option to set up an e-mail notification for various events. These notifications are sent to the user of the service. You can choose from the following notifications:
- Arrival notification under inspection
- Arrival notification rejected
- Arrival notification released
- Customs unavailable
The added people receive the notifications without having access to the service. External e-mail addresses can also be added.
Select the pencil icon. A screen will then open in which mail addresses can be added and deleted.
Related to